Curious or just want to install Windows Server 2012 Hyper-V Role in VMware Workstation 9 for testing purposes here’s how to:
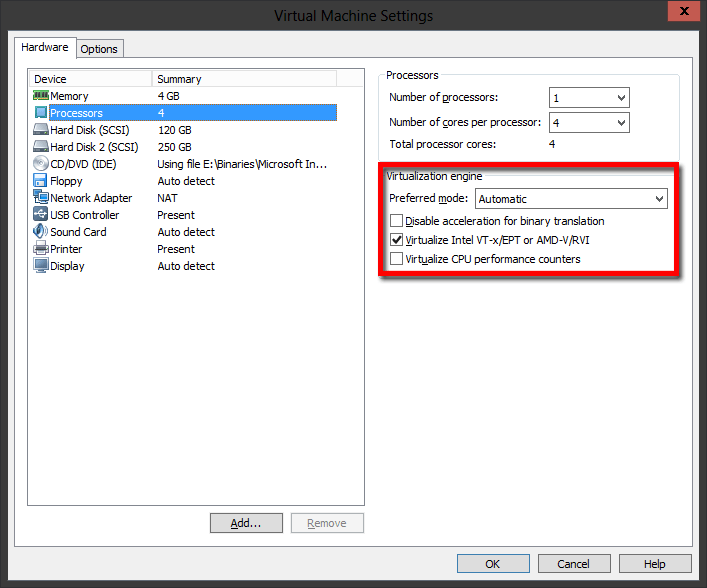
1. Create a Windows Server 2012 VM and make sure it has the following hardware configuration:
VM Settings> Hardware> Processors> Virtualization engine>
Preferred mode: Automatic
[/]Virtual Intel VT-x/EPT or AMD-V/RVI
2. If have an existing Windows Server 2012, shut it down and set it hardware configuration as above.
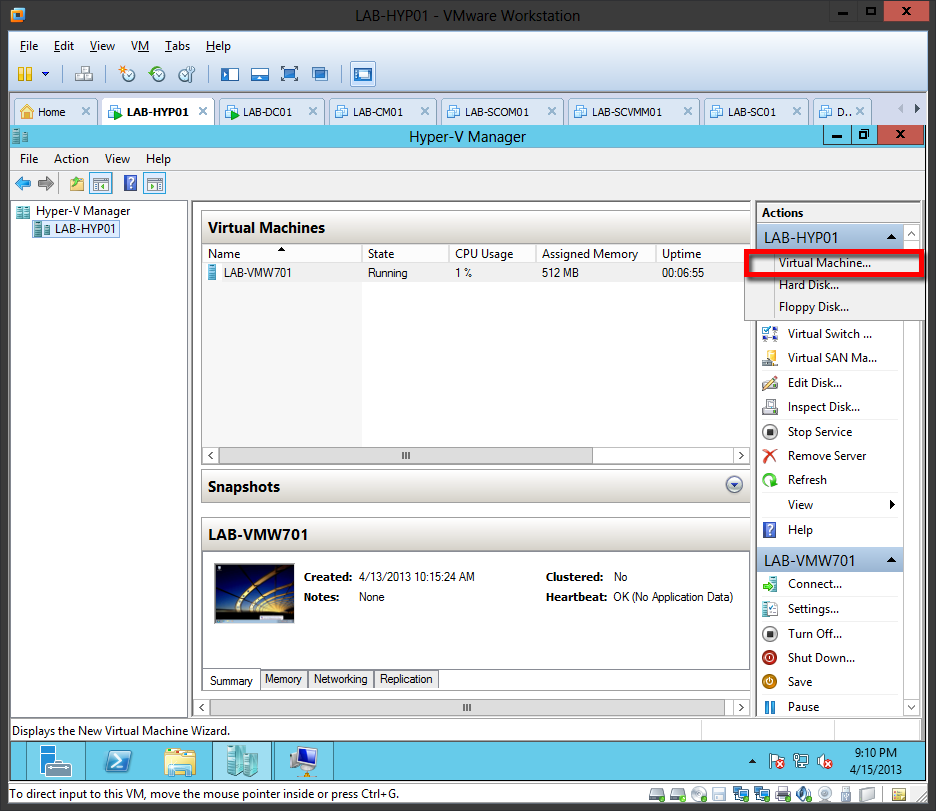
3. Fire up your Windows Server 2012 VM.
4. Now go to your VM’s directory (e.g., D:\VM\WS12-HyperV\) and look for the VMware virtual machine
configuration file (.mvx) and make a right-click then open with notepad and add the following lines
at the end of the VMX file:
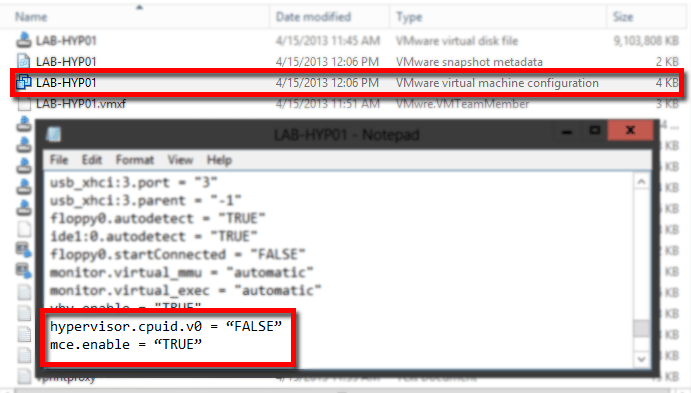
hypervisor.cpuid.v0 = “FALSE”
mce.enable = “TRUE”
Save the .mvx and close notepad.
5. Restart your virtual machine.
6. Install the Hyper-V role.

7. Create a Virtual Machine.
Note: Make sure to allocated enough RAM to your Hyper-V VM Host.


Leave a Reply