Managing Dell endpoints in Microsoft Intune is already a strong modern management story. But if your environment includes a significant Dell fleet, the Dell Management Portal adds another layer of visibility and convenience that can save administrators time — especially when it comes to Dell application publishing, BIOS policy workflows, and access to key device details like BIOS passwords and BitLocker recovery keys.
This guide walks through what Dell Management Portal is, what it is not, the Microsoft Intune requirements, how to connect it, how to explore the dashboard, how to publish Dell apps into Intune, and how to create and deploy a BIOS policy.
What is Dell Management Portal?
Dell Management Portal is a cloud-based Dell management experience that works alongside Microsoft Intune. Dell describes it as a way to manage Dell PCs from the cloud, in conjunction with Intune, with features that include access to BIOS passwords, BitLocker keys, Dell device visibility, and the ability to publish select Dell apps directly into Intune.
In practical terms, Dell Management Portal helps Intune admins do things such as:
- View Dell devices registered in Intune
- Retrieve BIOS passwords and BitLocker recovery keys for supported Dell PCs
- Publish supported Dell enterprise apps into Microsoft Intune
- Create Dell BIOS policies that are then surfaced and assigned through Intune
What Dell Management Portal is not
It is just as important to set expectations correctly.
Dell Management Portal is not a replacement for Microsoft Intune. Intune remains the management authority for device enrollment, policy assignment, application assignment, compliance, and reporting. Dell Management Portal complements Intune by adding Dell-specific capabilities and streamlining some Dell-related tasks.
It is also not a standalone on-device management agent for everything Dell. For BIOS configuration scenarios, Microsoft documents that the OEM workflow still depends on a BIOS configuration file plus an OEM Win32 app on the endpoint. For Dell, that app is Dell Command | Endpoint Configure for Microsoft Intune.
So the best way to position it is this:
Dell Management Portal extends Intune for Dell-specific lifecycle and configuration tasks — it does not replace Intune.
Microsoft Intune-side requirements
Before connecting Dell Management Portal, make sure your Intune and identity prerequisites are in place.
1) Licensing and tenant access
A valid Microsoft 365 subscription with Intune licensing is required. Dell’s setup guide also states that you should sign in with a Global Administrator account the first time you enable the integration.
2) Required permissions during integration
When enabling the integration, Dell lists permissions that include reading user profiles, directory data, BitLocker keys, Intune devices, and read/write access to Intune apps and device configuration policies. Dell’s technical paper also notes that write access is specifically needed for Intune applications and Intune device configuration/policies, while the remaining permissions are read-only.
3) Endpoint requirements for BIOS policy scenarios
For Dell BIOS configuration through Intune, Dell lists these prerequisites:
- Dell commercial client
- Windows 10 or later
- Device enrolled in Intune MDM
- Dell Command | Endpoint Configure for Microsoft Intune installed on the endpoint
4) Intune BIOS policy support
Microsoft states that BIOS configuration in Intune uses an OEM-generated configuration file and a corresponding OEM Win32 app, and that the Intune policy type is Templates > BIOS configuration and other settings for Windows 10 and later. Microsoft also warns to test and deploy BIOS changes in phases because bad settings can affect bootability or BitLocker access.
Step-by-step: Connect Dell Management Portal to Intune

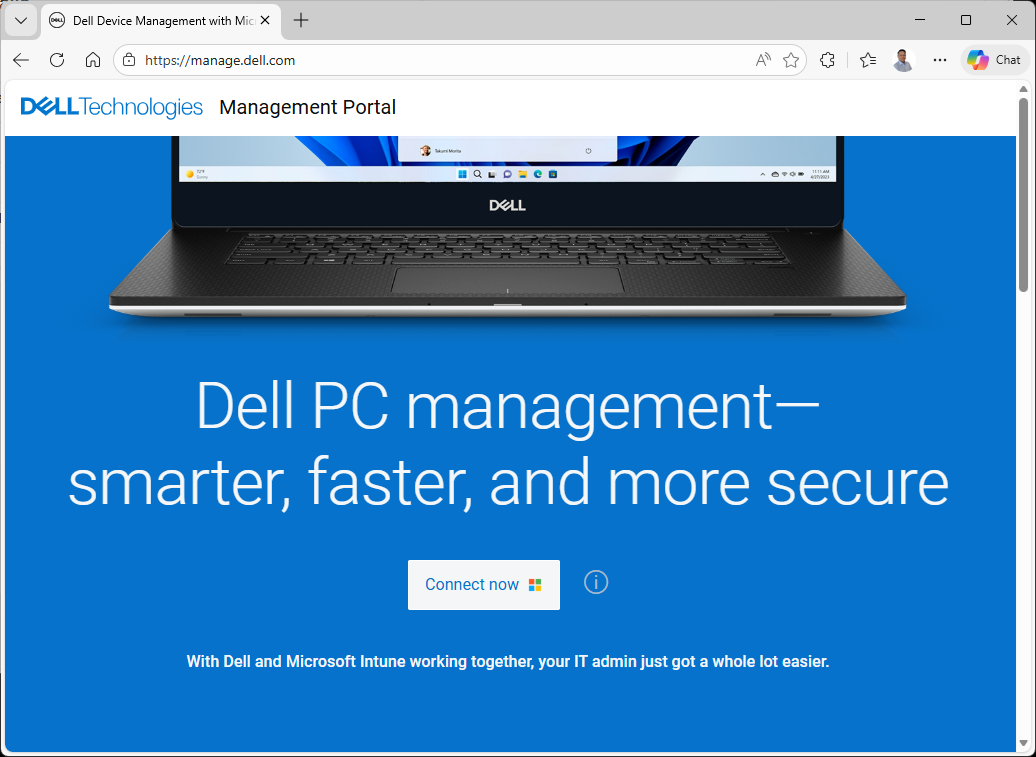
Step 1: Open Dell Management Portal
Go to manage.dell.com or launch it from the Intune Partner Portal path Dell references.
Step 2: Click Connect now
Dell’s setup documentation explicitly calls out the Connect now button as the starting point for tenant integration.

Step 3: Sign in with your Microsoft 365 / Entra admin account
Use a tenant Global Administrator for the initial connection so consent can be granted on behalf of the organization.

Step 4: Review and approve the requested permissions
These permissions allow Dell Management Portal to read Dell-relevant data from Intune and write Dell applications and configuration policies into your Intune environment.
Step 5: Wait for the tenant connection to complete
Once connected, the portal’s Dell-specific capabilities become available to the administrator. Dell notes that the data remains in the Microsoft tenant and is accessed through Microsoft Graph-based transactions.
Exploring the Dell Management Portal dashboard
After sign-in, you land on the Dashboard. Dell’s technical paper describes the dashboard as the home page that provides quick insights and immediate actions for the IT admin.
Here’s what you should expect to see:
Dashboard

The dashboard provides a quick snapshot of your Intune environment, including:
- Number of Dell devices
- Number of Dell applications
- A quick BIOS password search by service tag
Devices

The Devices page shows Dell PCs managed within Intune and includes details such as device name, user, service tag, model, BIOS password visibility controls, and access to BitLocker recovery keys. It also includes app version visibility and update indicators for suggested Dell apps present on the device.
Apps

The Apps page lists supported Dell applications and shows status states such as:
- Published
- Optional update available
- Recommended update available
- Critical update available
BIOS Policies

The BIOS Policies area lets you view existing hardware configuration policies that are accessible through Intune and also create new policies through a guided workflow.
How to deploy an application from Dell Management Portal to Intune
One of the easiest wins with Dell Management Portal is application publishing. Dell describes this as a simplified process where the selected Dell application version is automatically published to Intune.
Step 1: Go to the Apps tab
From the portal dashboard, click Apps. Dell’s deployment article uses this workflow directly.
Step 2: Select the Dell application you want
Dell states that the portal supports publishing select Dell applications. In the technical paper appendix, Dell lists six supported applications at launch:
- Dell Command | Monitor
- Dell Command | Endpoint Configure for Microsoft Intune
- Dell Command | Update
- Dell SupportAssist for Business PCs
- Dell Trusted Device
- Dell Client Device Manager
Step 3: Review version, OS support, and language support
The application details page provides the application name, description, version, supported operating systems, supported languages, and publish status.
Step 4: Click Publish now
Dell says that once Publish now is selected, the application is automatically published to Intune and you can observe the upload progress steps.


Step 5: Open Intune after publishing completes
Dell’s published workflow shows the app becoming available in Intune once the process finishes.

Step 6: Assign the app in Microsoft Intune
After the app is published into Intune, use your normal Intune app assignment flow:
- Go to Apps
- Open the published Dell app
- Assign to users or devices
- Choose Available, Required, or Uninstall as needed
Why this matters
Instead of manually packaging every Dell enterprise app yourself, Dell Management Portal helps reduce the friction by pushing supported apps directly into your Intune catalog. That makes it especially attractive for admins who want quicker Dell app onboarding with less packaging overhead. This is an inference based on Dell’s documented publish workflow and Intune integration behavior.
How to create and deploy a BIOS policy
This is where Dell Management Portal becomes especially interesting for Dell-focused endpoint administration.
Microsoft’s Intune BIOS configuration feature for Dell relies on two things:
- A BIOS configuration file created with an OEM tool
- A Dell Win32 app on the device that reads the configuration and BIOS password data
Dell Management Portal provides a guided policy creation experience for this.
Before you start
Make sure the following are already true:
- Devices are corporate-owned and MDM-enrolled in Intune
- Dell Command | Endpoint Configure for Microsoft Intune is installed
- You have validated the target settings in a pilot group first
Step 1: Open BIOS Policies
In Dell Management Portal, go to BIOS Policies. Dell describes this page as the place where you can view existing policies or create a new one.
Step 2: Click Create a new policy
Dell’s technical paper states that an IT administrator can click create a new policy to start the workflow.
Step 3: Choose how to build the policy

Dell documents two approaches:
- Start a blank policy
- Copy then edit an existing policy
For beginners, starting from a blank policy is the cleanest approach.
Step 4: Name the policy and add a description
Dell’s workflow explicitly includes naming the policy and adding a description before moving on.

Step 5: Configure BIOS attributes
Add the BIOS attributes and desired values based on your standards — for example, security-related BIOS controls, boot settings, or battery/firmware preferences depending on your use case. Dell notes that the guided workflow lets you configure the attributes according to requirements and add them to the policy.
Step 6: Select password protection preferences
Dell’s policy creation flow includes a password protection preferences step before publishing.
Step 7: Review and publish
Review the settings, then publish the policy. Dell indicates that once successful, you can use View in Intune to jump to the policy details in Microsoft Intune.
Step 8: Assign the BIOS policy in Intune
Dell’s technical paper shows the remaining assignment flow happening in Intune:
- Open the published policy in Intune
- Go to Properties
- Edit Assignments
- Under Included Groups, choose Add groups
- Select the target groups
- Click Review + save and then Save
Step 9: Monitor deployment carefully
Because BIOS changes are sensitive, follow Microsoft’s guidance and deploy in phases. Start with a small pilot group, validate expected behavior, then expand gradually.
Best practices for first-time admins
If you are just getting started, a few practical habits will make the rollout much smoother:
- Start with a pilot device group before assigning BIOS policies broadly.
- Publish Dell apps first, especially the Dell BIOS-related app dependencies required by your BIOS configuration scenario.
- Use clear naming standards for BIOS policies, such as
Dell - BIOS - Security Baseline - LatitudeorDell - BIOS - Boot Restrictions - Kiosk. - Treat Dell Management Portal as an Intune accelerator, not a separate management plane.
Final thoughts
Dell Management Portal is a free Dell tool that can meaningfully enhance the way IT teams manage Dell endpoints with Microsoft Intune. It gives admins easier access to Dell-specific device information, simplifies publishing supported Dell applications into Intune, and provides a guided experience for creating BIOS policies that are then deployed through Intune.
For organizations already invested in Microsoft Intune and Dell commercial endpoints, Dell Management Portal is a practical complement. It does not replace Intune — it strengthens the Dell side of your modern management story and helps you get more value from the investments you already made.
Leave a Reply