
In this post I will share the step-by-step process on how to install System Center 2012 Configuration Manager as a Standalone Primary Server in a Windows Server 2012 lab environment.
What you need:
Download the iso files from your TechNet/MSDN subscription or TechNet Evaluation Center.
Step 1. Setup SCCM 2012 LAB Environment

I have the following virtual machines:
DEMO-DC01 – With 2GB of RAM. .
DEMO-CM01 – With 8GB of RAM. C: 60GB (OS) D: 160GB (DATA).
In DEMO-DC01, create the following domain accounts for now.
- SCCMAdmin – SCCM Admin Account
- SQLSvrAgnt – for running SQL Services
Step 2. Install and Configure SQL Server 2012 in DEMO-CM01.
In DEMO-CM01 login as LAB\Administrator

Add LAB\SCCMAdmin, LAB\DEMO-CM01 and LAB\Administrator to the local Administrators group.
Mount the SQL Server 2012 installer and run setup.exe
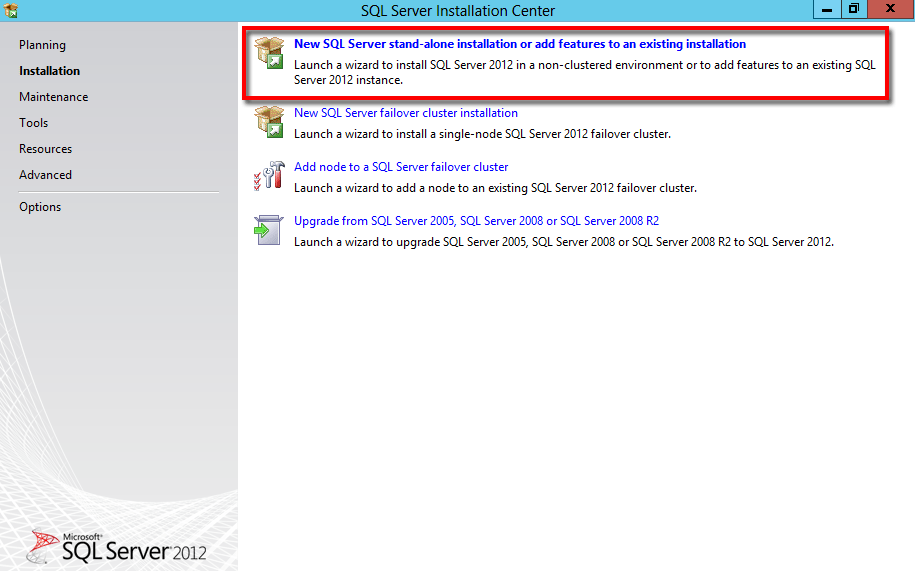
From the menu, click on the New Server stand-alone installation or add features to an existing installation.
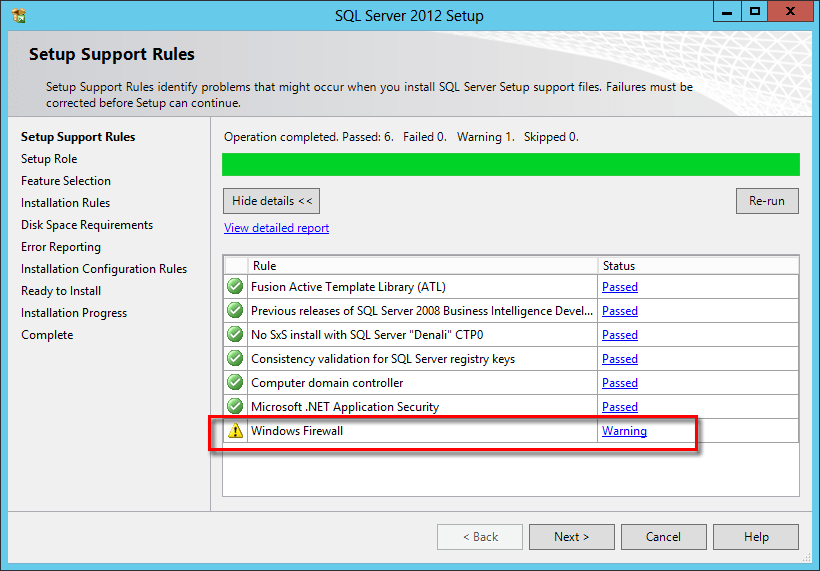
When you get the Windows Firewall warning in the Setup Support Rules this means that you need to open TCP port 1433 and 4022 for SQL replication, Here are the steps:
——————————————————————————————————————————————————
Open TCP port 1433 and 4022 for SQL replication
——————————————————————————————————————————————————
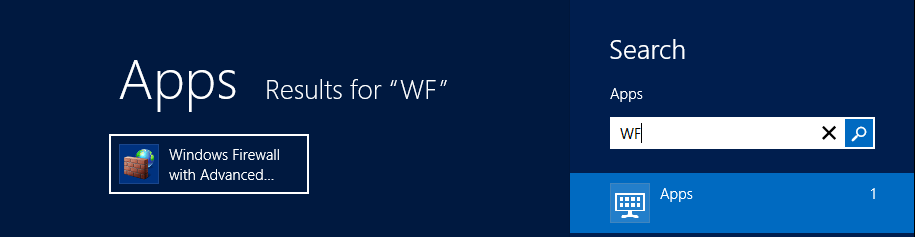
Press Windows logo key ![]() + C to launch Charms and in the Search Apps box, type wf.msc for Windows Firewall with Advance Security.
+ C to launch Charms and in the Search Apps box, type wf.msc for Windows Firewall with Advance Security.

In the left pane of Windows Firewall with Advanced Security right-click Inbound Rules, and then click New Rule.

In the Rule Type dialog box, select Port and then click Next.

In the Protocol and Ports dialog box, select TCP. Select Specific local ports, and then type port numbers 1433 for SQL Server default instance and 4022 for Inter-site communications use the SQL Server Service Broker. Click Next.

In the Action dialog box, select Allow the connection, and then click Next.

In the Profile dialog box, select Domain and then click Next.

In the Name dialog box, type a profile name such as SQL ports for ConfigMgr 2012 and then click Finish.
——————————————————————————————————————————————————
…SQL Server 2012 Setup continued
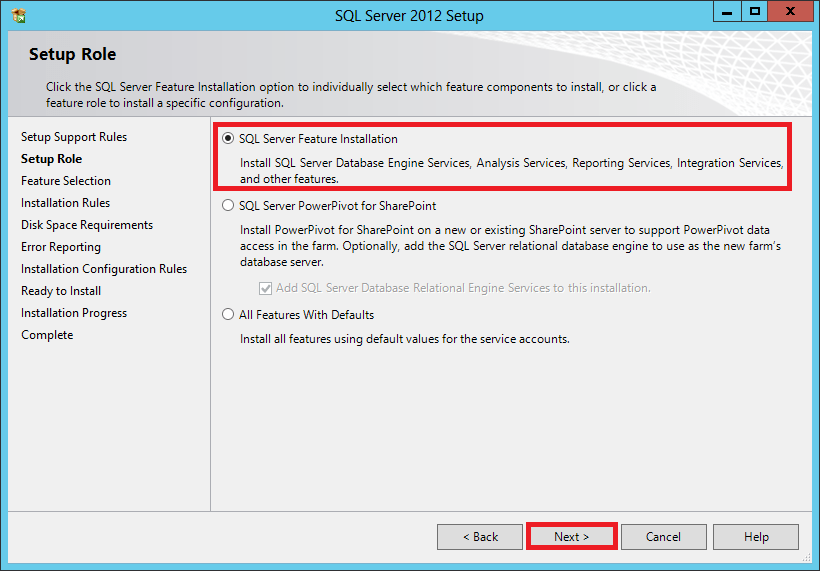
In the Setup Role by default, SQL Server Feature Installation is selected, click Next.
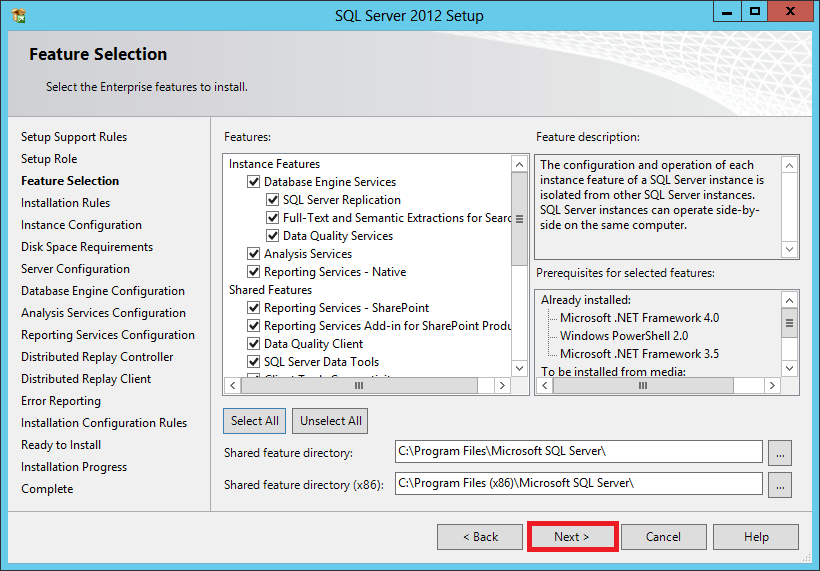
In the Feature Selection, just click the Select All button and click Next.
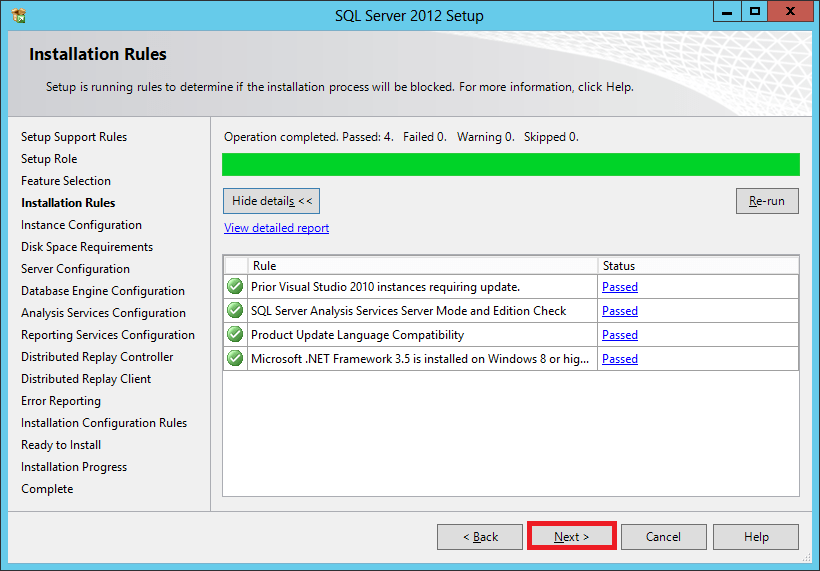
In the Installation Rules, click Next.
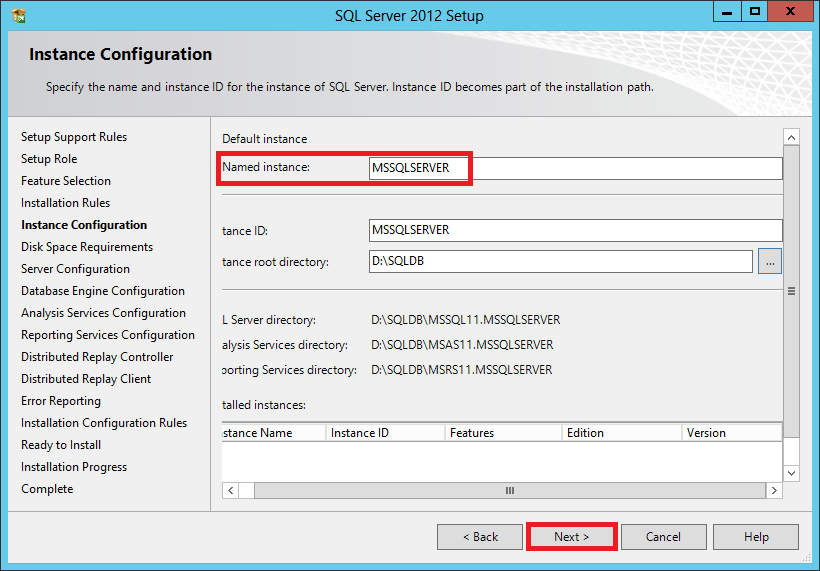
In the Instance Configuration, select Named instance and set it to MSSQLSERVER. You may change the Instance root directory to another location (e.g., D:|SQLDB). Click Next to continue.
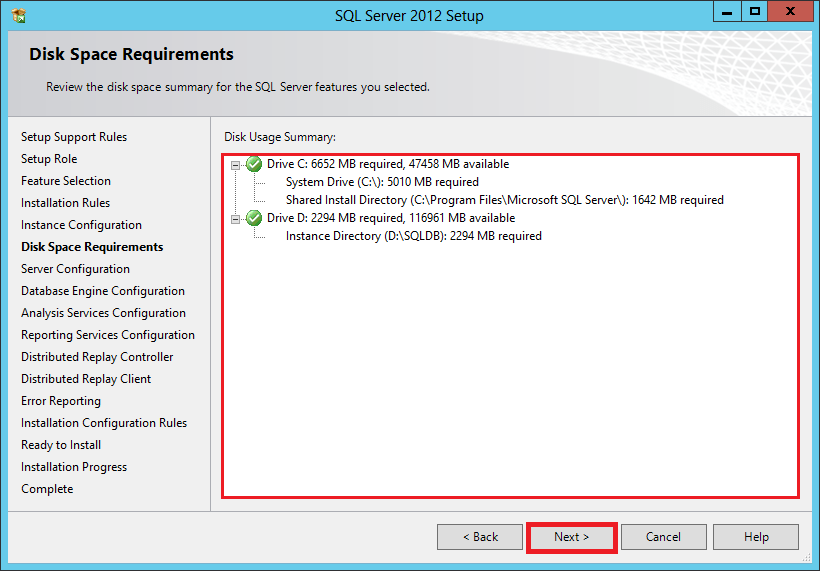
In the Disk Space Requirements, click Next.
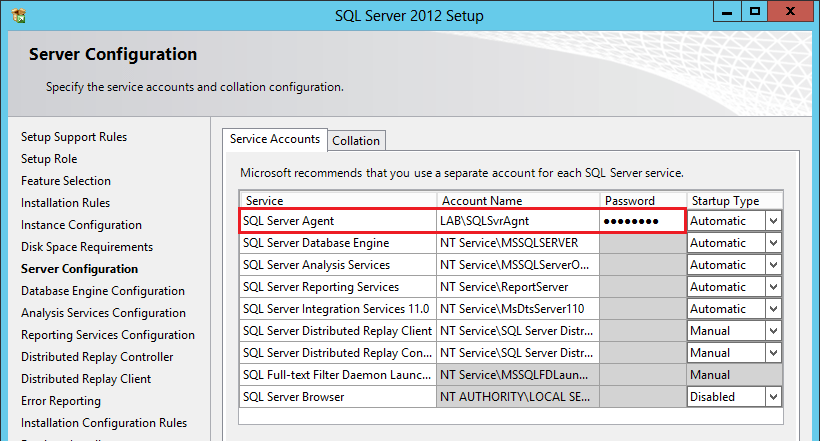
In the Server Configuration, Service Accounts tab, make sure to configure ALL SQL services to run under a domain user account (e.g., LAB\SQLSvrAgnt) instead of the local system or network services.
——————————————————————————————————————————————————
This is to prevent the error “Fail to create SQL Server Certificate…” during installation during installation of Config Manager 2012 later.

——————————————————————————————————————————————————
…Moving on, in the same window click the Collation tab.
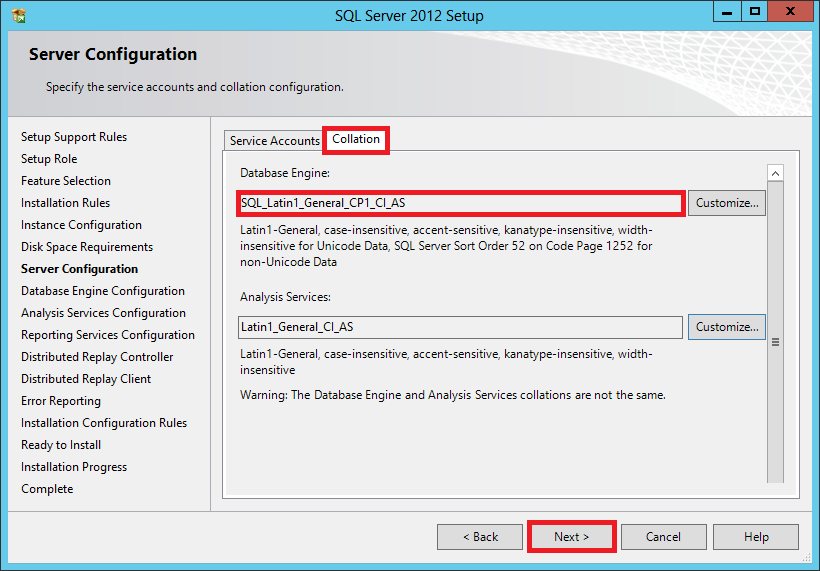
In the Collation tab make sure SQL_Latin1_General_CP1_CI_AS is select are the Database Engine. If SQL Server is installed with a different collation ConfigMgr 2012 installation will fail. Click Next to continue.
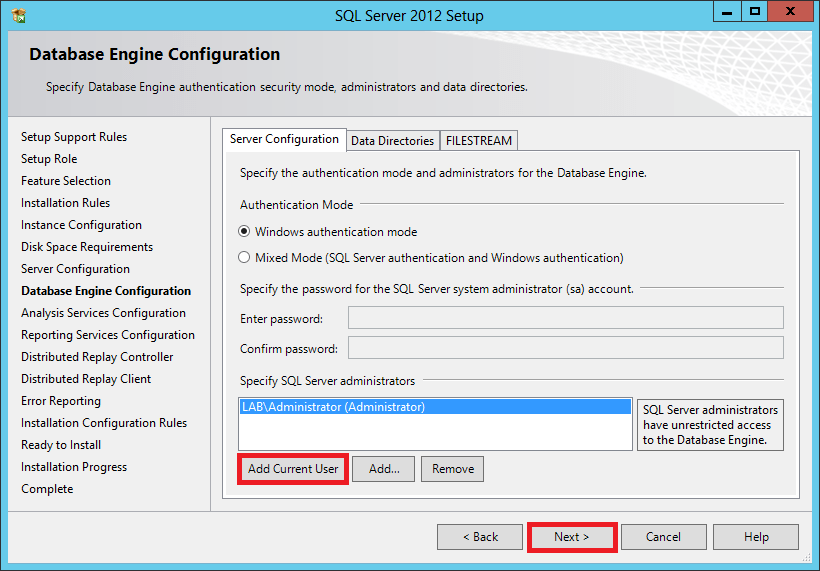
In the Database Engine Configuration, click Add Current User and click Next.
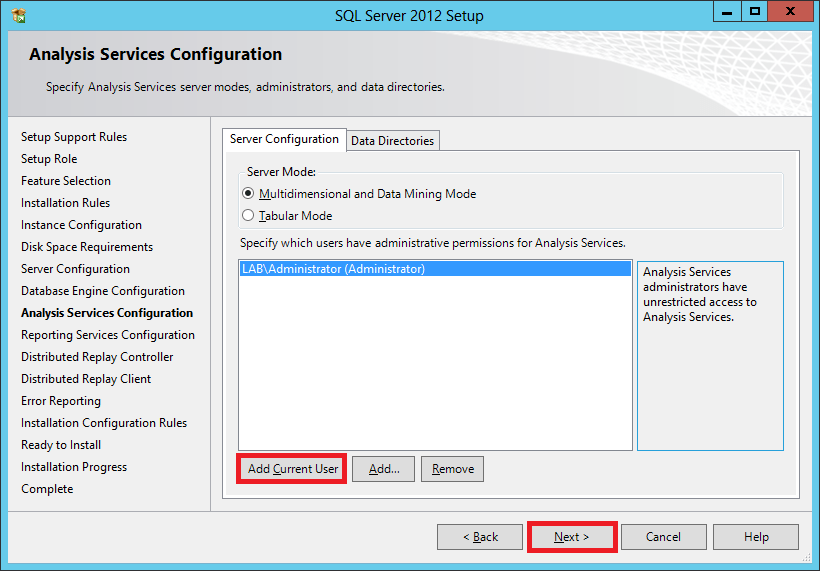
In the Analysis Services Configuration, click Add Current User and click Next.
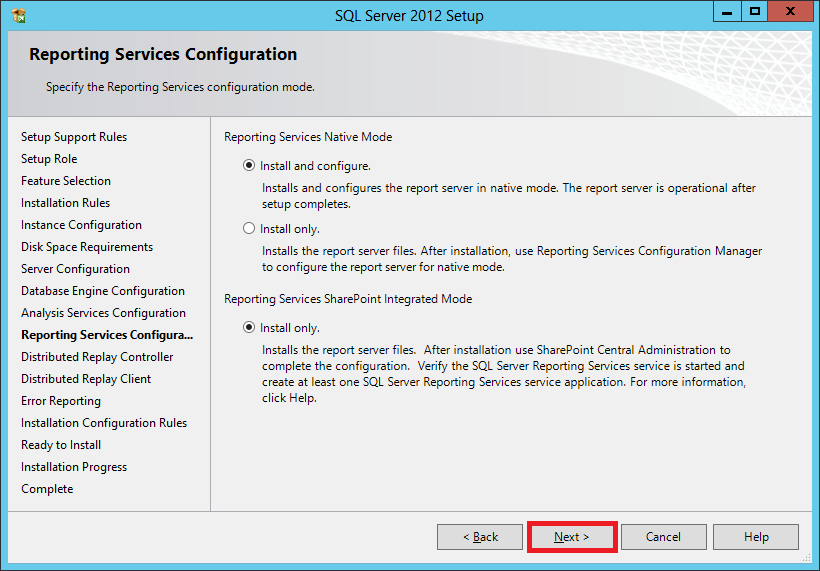
In the Reporting Services Configuration, Click Next.
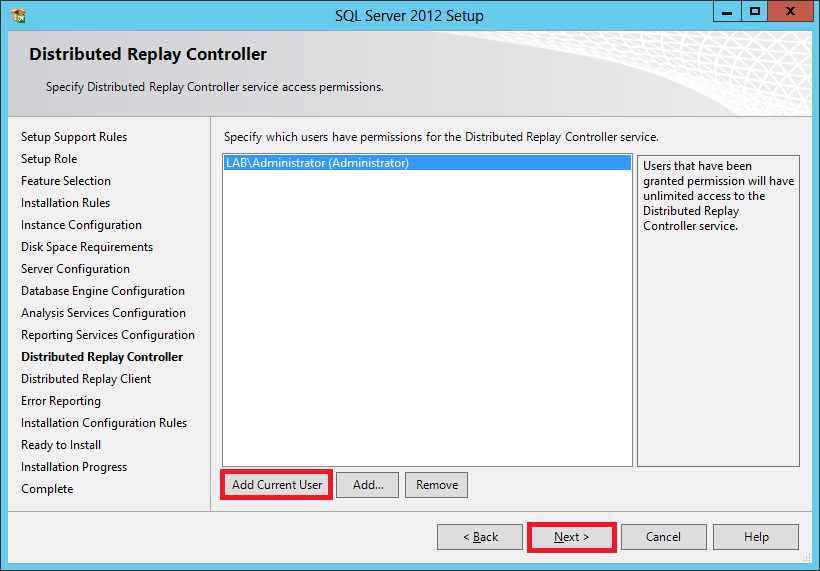
In the Distributed Replay Controller, click Add Current User and click Next. In the Distributed Replay Controller, Click Next.
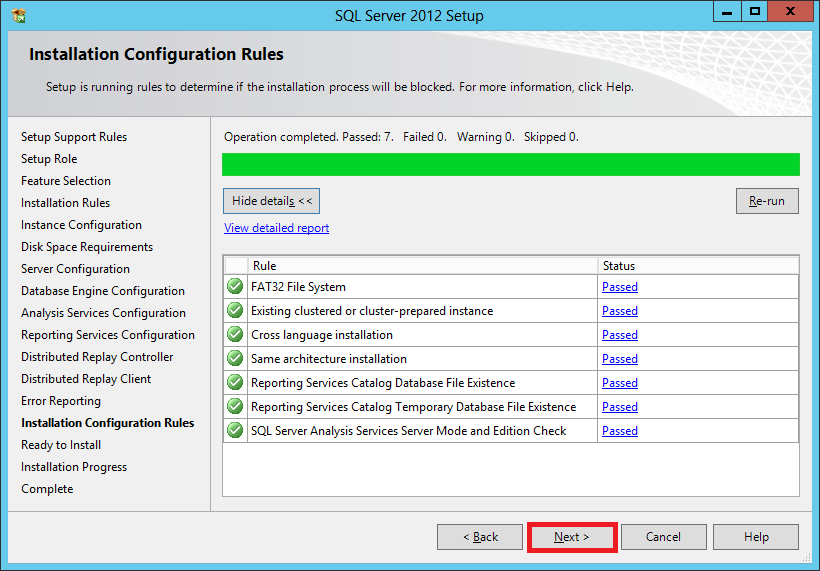
In the Installation Configuration Rules window, once the checking is done, click Next.
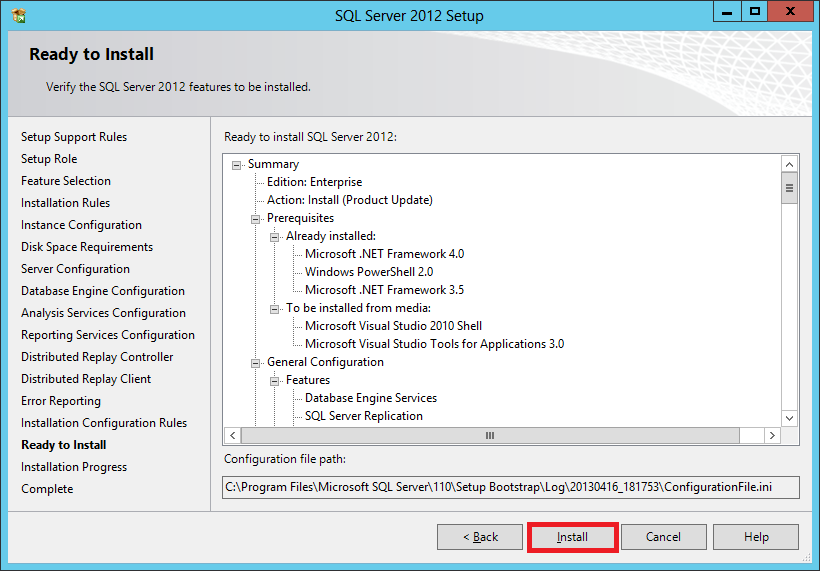
SQL Server 2012 is ready to install, click the Install button.
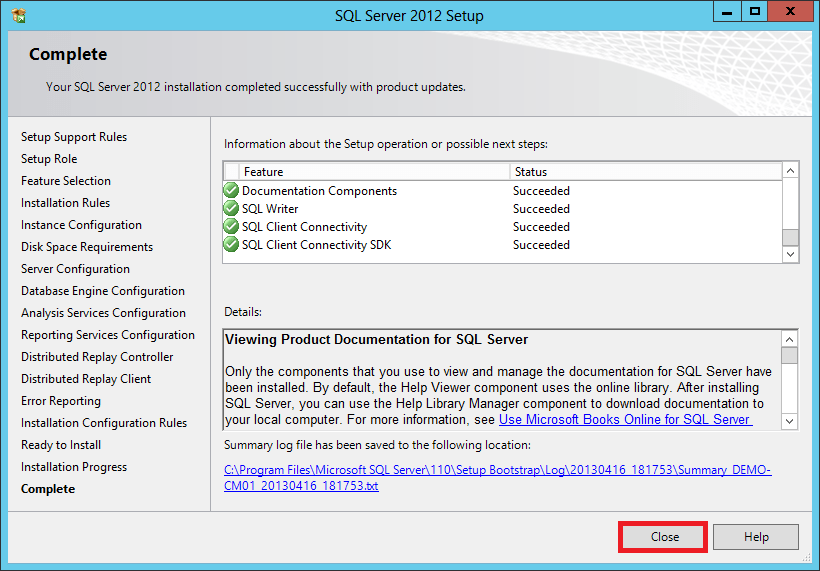
Confirm that SQL Server 2012 is successfully installed and click the Close button.
Launch the SQL Server Management Studio
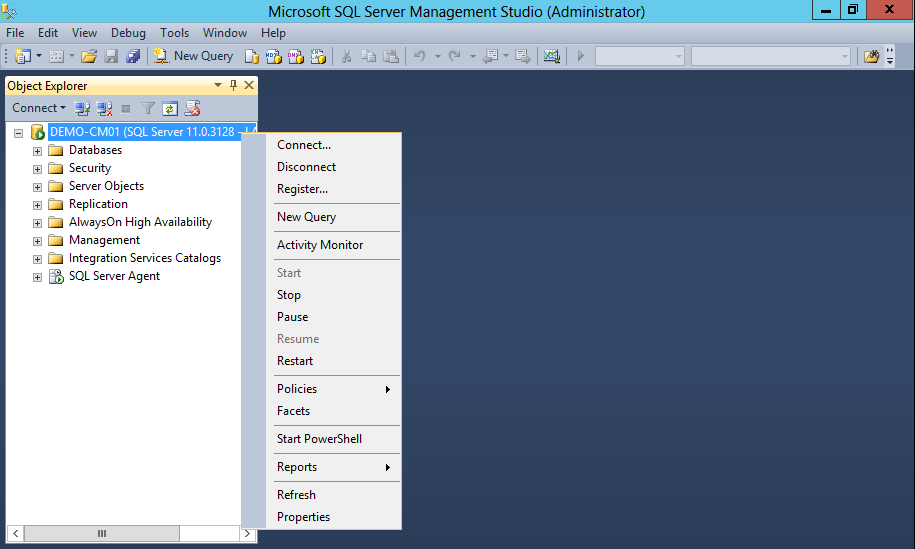
Right-click on the Sequel Server, DEMO-CM01 and view its Properties.
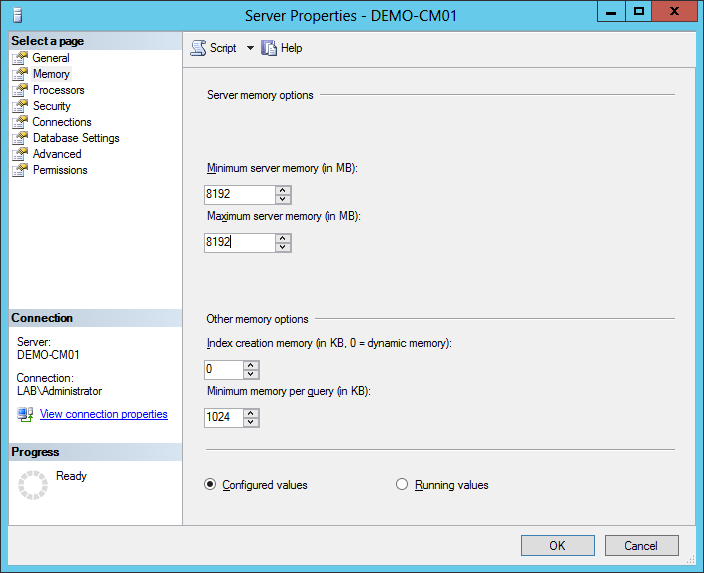
Under the Memory I have set the Minimum and Maximum memory size to 8192 if don’t set this into 8192 you’ll have a little warning during the installation of Config Manager 2012. Setting the Memory b/w 2048 to 4096 will still work. By default the Minimum server memory (in MB) is set to 0 and the Maximum server memory (in MB) is set to 2147483647.

In the Security, make a right-click under Logins and select New Login…
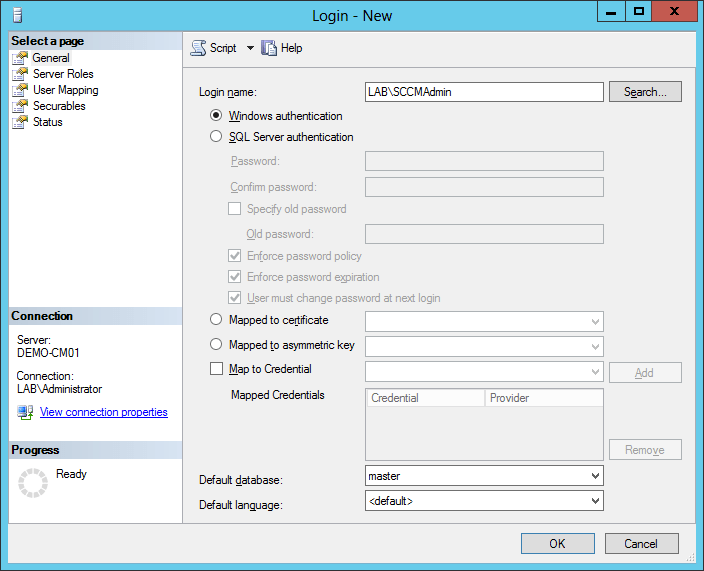
Add the LAB\SCCMAdmin account.
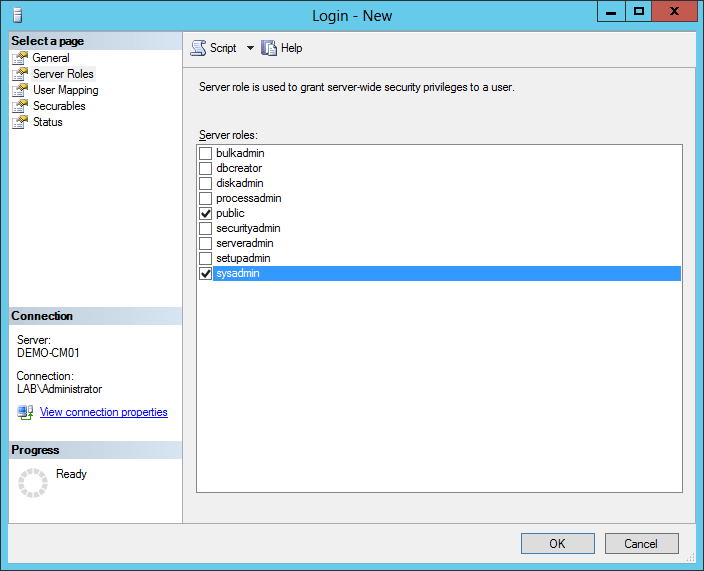
Under Server Roles tick the [ ⁄ ]sysadmin check box to give the SCCMAdmin account SQL privileges, click OK to close the window. Close the SQL Server Management Studio and we’re done with the setup of SQL Server 2012.
Step 3. Create System Management Container and Delegate of Permission.
Go back to DEMO-DC01, in the Server Manager > Tools open ADSI Edit to create the System Management container.

In the left pane, browse the Default naming context > expand DC and look for CN=System > make a right-click > in the context menu select New > Object…

In the Create Object window, scroll and select container and click Next.

In the Value: type System Management (it’s important to take note of the spelling, capitalization and the space between the two words).

click Finish to close the window.
From the Server Manager > Tools open Active Directory Users and Computers click View and select Advance Features to view additional containers that are not available by default.
We need to give Config Manager (DEMO-CM01) privileged to update the content of the System Management container.

In ADUC browse for System > System Management > Right-click and select Delegate Control.
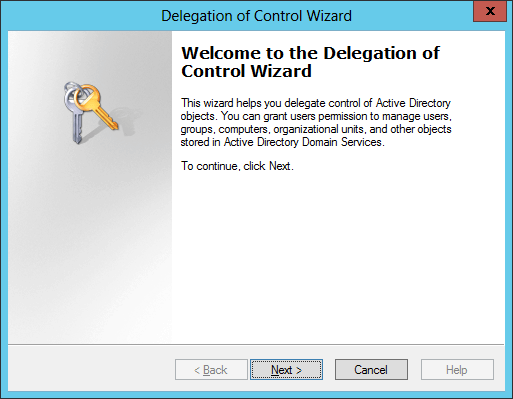
In the Delegation of Control Wizard click Next.
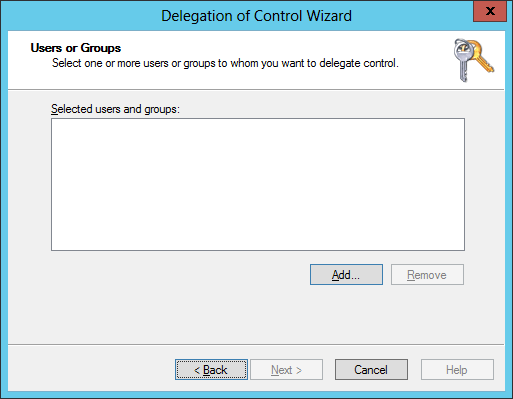
Click the Add button
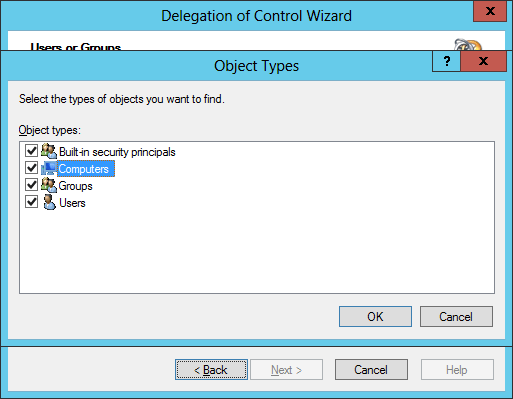
In the Object Types make sure to select Computers.
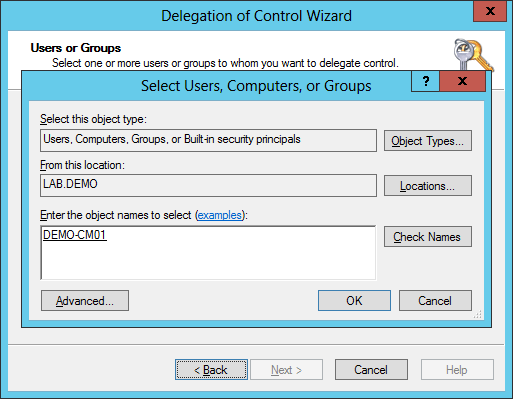
Search for the Config Manager server (DEMO-CM01).
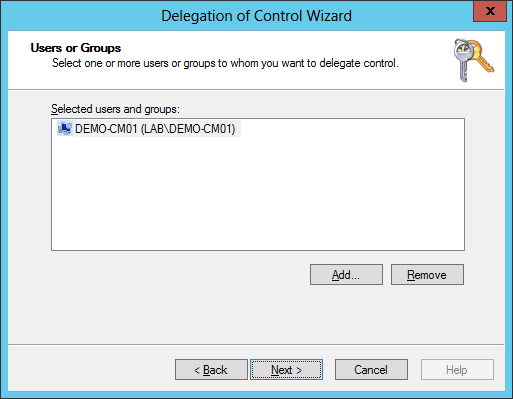
Once the server is selected, click Next.
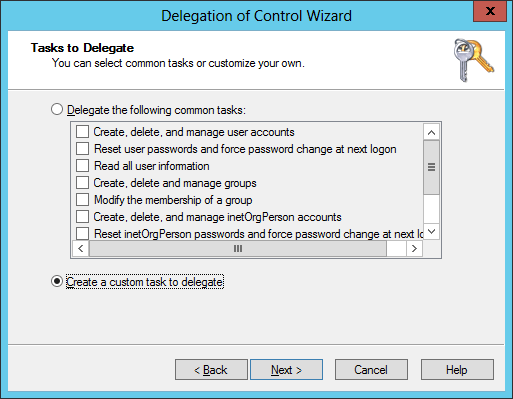
Select Create a custom task to delegate click Next.
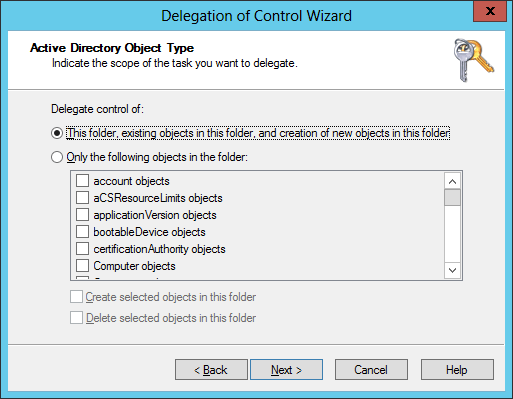
In the Active Directory Object Type select This folder, existing objects in this folders, and creation of new objects in this folder and click Next.
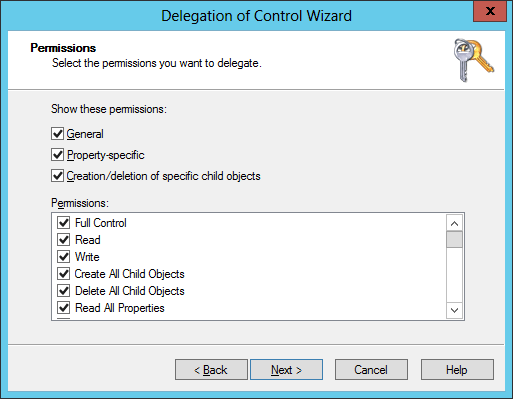
Tick on the 3 permissions General, Property-specific and Creation/deletion of specific child objects. Under Permissions tick on Full Control and click Next.
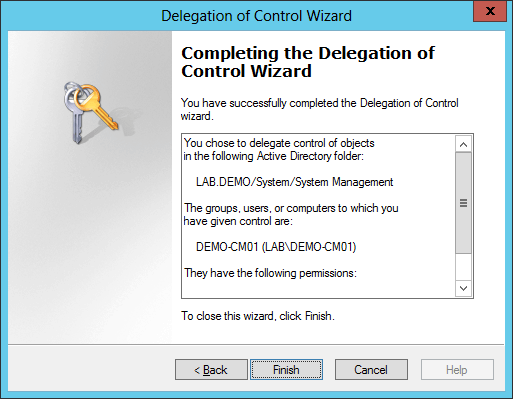
Click Finish to close the wizard.
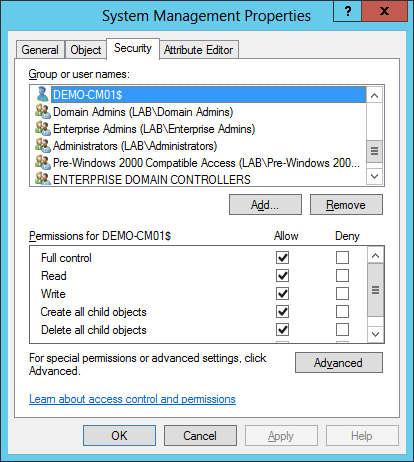
Verify that DEMO-CM01 permission is full control, in Active Directory, right-click the System Management and select properties.
Step 4. Install Web Server (IIS) Role and other Features in DEMO-CM01.
In Server Manager > Manage > Add Roles and Features


In the Server Roles, select Web Server (IIS)

When prompted to “Add features that are required for Web Server (IIS)?” click the Add Features button.and click Next.
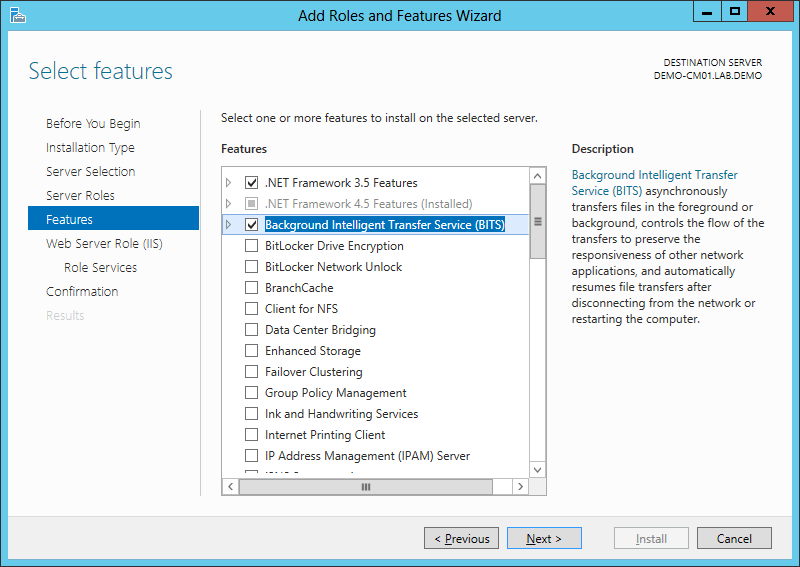
In Features, select .NET Framework 3.5 Feature and Background Intelligent Transfer Service (BITS)

When prompted to “Add features that are required for Background Intelligent Transfer Service (BITS)?” click the Add Features button.
BITS – is the technology that allows us to throttle all the network communication that occurs between servers to client where it utilizes idle bandwidth to transfer data.

Still in the Features page, scroll down and select Remote Differential Compression (RDC) and click Next.
RDC – is a client–server synchronization algorithm which BITS leans on to ensure that the files goes in the most efficient way possible.
In the Web Server Role (IIS) > Role Services, verify that the following are selected:
- Common HTTP Features: Default Document, Directory Browsing, HTTP Errors Static Content, HTTP Redirection
- Health and Diagnostics: HTTP logging, Logging tools, Request Monitor Tracing
- Performance: Static Content Compression
- Security: Basic Authentication, IP and Domain Restrictions, Windows Authentication
- URL Authorization, Request Filtering
- Application Development: .NET Extensibility 3.5, .NET Extensibility 4.5, ASP.NET 3.5, ASP.NET 4.5, ISAPI Extensions, ISAPI Filters
- Management Tools: IIS Management Scripts and Tools, Management Service | IIS 6 Management Compatibility
click Next and in the Confirmation page, click on Install.
Step 5. Extend Active Directory Schema for SCCM 2012.
After installing IIS and the other features, mount the installation file of System Center 2012 Configuration Manager and browse to its directory <Drive>:\SMSSETUP\BIN\X64\

Double click the extadsch.exe

extadsch.exe will run briefly and closes after.
When you run the Extadsh.exe its actually running ConfirMgr_ad_schema.ldf, this LDF file contains the instructions for what needs to be changed in Active Directory to support the schema extensions.

You can examine its content by opening ConfirMgr_ad_schema.ldf in Notepad.

If you’re curious go and browse through the SMS Schema Attributes. This will give you better understanding on how Active Directory schema extensions work for Configuration Manager.
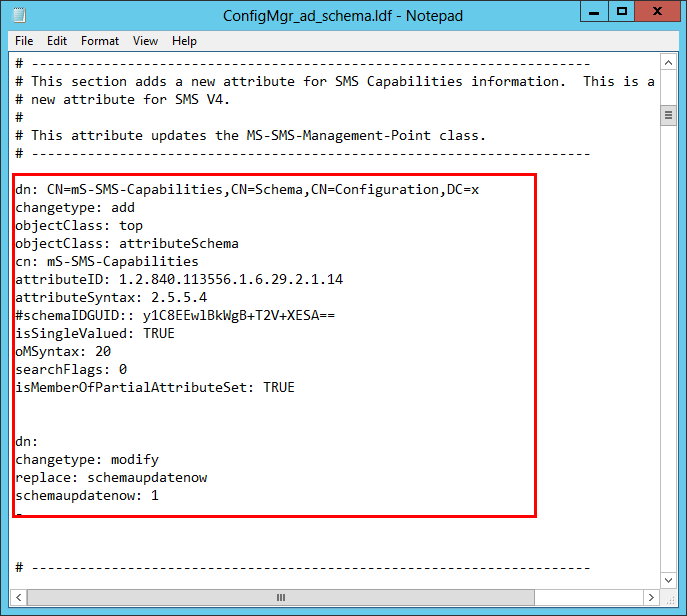
From the LDF file:
# ———————————————————————-
# This section adds a new attribute for SMS Capabilities information. This is a
# new attribute for SMS V4.
#
# This attribute updates the MS-SMS-Management-Point class.
# ———————————————————————-
dn: CN=mS-SMS-Capabilities,CN=Schema,CN=Configuration,DC=x ← this is the path of where the change is going to happen
changetype: add ← it’s going to add something
objectClass: top
objectClass: attributeSchema ← theres an obect class that attributes schema
cn: mS-SMS-Capabilities ←in this folder location
attributeID: 1.2.840.113556.1.6.29.2.1.14 ← here is the ID
attributeSyntax: 2.5.5.4 ←Syntax value
#schemaIDGUID:: y1C8EEwlBkWgB+T2V+XESA== ← here its showing the GUID
isSingleValued: TRUE
oMSyntax: 20
searchFlags: 0
isMemberOfPartialAttributeSet: TRUE
dn:
changetype: modify
replace: schemaupdatenow ← this portion will update the schema
schemaupdatenow: 1
For more information about Extending the Schema in System Center 2012 Configuration Manager, go to this link: http://blogs.technet.com/b/configurationmgr/archive/2012/10/30/extending-the-schema-in-system-center-2012-configuration-manager.aspx
Back in DEMO-DC01 in the root directory, you’ll see a small text file ExtADSch.txt and when you open it, you’ll find the line: Successfully extended the Active Directory schema.

Step 6. Install Config Manager 2012

In the Config Manager installation directory go ahead and double-click splash.hta.

In the Setup menu go ahead and click Access server readiness it will run the Installation Prerequisite Check.
The Installation Prerequisite Check will check your server for problems that will prevent Config Manager installing on your machine and will give you details how to resolve them. Some “Warning” status will also show but this won’t prevent from installing Config Manager.

For this case we have a “Warning” status on “WSUS DSK on site server” this can be installed later. In some cases if you have under 8GB of RAM it will give you a “Warning on SQL Server process memory allocation“. Warning indicates that you need to fix things before the installing Config Manager. Click OK to close the window.
Back in the Setup page.

Click Install.

In the 1st page its basically reminding us to make sure we’ve met the minimum requirement for Config Manager 2012 installation, click Next.

Install a Configuration Manager primary site and click Next.

Enter the product key if you have it, else choose Install this product as an evaluation.

Accept the license terms and click Next.

Accept all the licenses terms and click Next.

In the Prerequisite Downloads, choose where b/w the 2 options and click Next.

In the Server Language Selection leave the default selection unless other languages are required, click Next.

In the Client Language Selection leave the default selection unless other languages are required, click Next.

Enter a 3 character site code and site name that normally pertains to the site location and click Next.

In the Primary Site Installation page, for lab purposes we will select Install the primary site to a stand-alone site by selection this, you will not be able to extend beyond one site.
A message will prompt that you have selected the stand-alone primary site and informing you that you will not be able to join that site to a hierarchy moving forward.
For production implementation, your design decision is very important because you cannot undo this after the installation.

Click Yes to continue.

In the Database Information just leave the default as we have SQL installed in the same server. Leave the default port numer for the SQL Server Broker. Click Next

In the SMS Provider Settings leave the default site, this allows the site database to communicate with Config Manager console. Click Next.

In the Client Computer Communication Settings, since we don’t have a fully functional PKI infrastructure we’ll select Configure the communication method on each site system role. Click Next.

The Site System Roles page is already populated, click Next.
the Management Point is the point of communications b/w the client and the server Distribution Point is the location where you store your packages and applications.

You may or may not join the CEIP. Click Next.

Click the Next button for the final Prerequisite Check.

Click Begin Install.

Confirm that your installation is successfully. Click Close to complete you’re installation.

Launch Config Manager 2012 console and configure it as per your requirements.
Summary: here are the things we’ve done to complete the Config Manager 2012 installation.
- Build a Windows Server 2012 server
- Install SQL Server 2012
- Verify SQL Collation is set to SQL_Latin1_General_CP1_CI_AS
- Configure SQL Server memory allocation
- Windows Firewall
- Open TCP port 1433 and 4022
- Create SCCM Admin account in AD.
- Assign to SQL Server “sysadmin” role.
- Create “System Management” container in AD
- Delegate SCCM Servers Full Control access.
- Install IIS Role and Services:
- Common HTTP Features: Default Document, Directory Browsing, HTTP Errors Static Content, HTTP Redirection
- Health and Diagnostics: HTTP logging, Logging tools, Request Monitor Tracing
- Performance: Static Content Compression
- Security: Basic Authentication, IP and Domain Restrictions, Windows Authentication
- URL Authorization, Request Filtering
- Application Development: .NET Extensibility 3.5, .NET Extensibility 4.5, ASP.NET 3.5, ASP.NET 4.5, ISAPI Extensions, ISAPI Filters
- Management Tools: IIS Management Scripts and Tools, Management Service | IIS 6 Management Compatibility
- Add Windows Features: NET Framework 3.5, Background Intelligent Transfer Service (BITS), Remote Differential Compression
- Extend AD schema
- Run Prerequisite Check
- Install Config Manager 2012
References:

Leave a Reply