This post will show the step by step process on how to create a Windows 7 system image of a physical machine and restore it in a virtual machine on a lab environment.

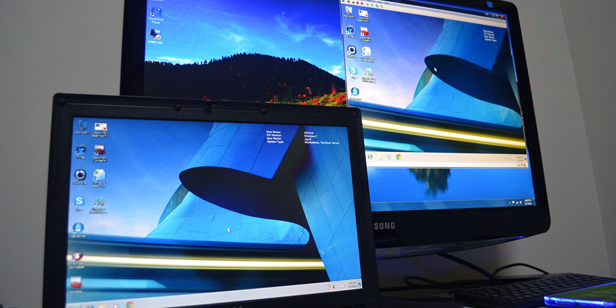
I created an image backup of W7D430 (host name of my Windows 7 notebook) as I prepare to install Windows 8 Beta in the current machine. The image above is the actual physical and virtual machines back in may lab.
1st Step: Creating a System Image
In Windows 7, access Backup and Restore from Control Panel\System and Security.

On the upper left of the screen select and click Create a system image.

The Create an system image windows will pop up and it will ask you where to you want back up your image. In this example I have selected to store the system image in a network share. Hit the Next button to continue.

In the next screen, it will ask you which drives you want to backup from your physical machine. (By default the system drive is selected). Click Next to confirm your backup settings.

Click the Start backup button to begin the backup.

The backup time will take a few hours depending on your disk size. The image backup will be stored in a folder named WindowsImageBackup and the name of the system image backup folder will be the same as your computer’s host name.

Step 2: Restoring the System Image in a Virtual Machine.
In my Hyper-V environment I created a new virtual machine and named it as CL-W7RESTORE.

In the Installation Option, boot the VM from a Windows 7 ISO image.

In the summary screen, review your VM settings, click the Finish button to complete the creation of the new VM and launch it from the Hyper-V Manager.

In the lower portion of Install Windows option screen, click Repair your computer.

The System Recovery Options window will appear, select the option Restore your computer using a system image that you created earlier and click Next.

The Re-image your computer wizard will try to search for a system image, just hit Cancel if you see this this warning prompt.

Click Next to proceed.

Click the Advanced… button and browse for a system image.

On the next option select Search for a system image on the network.

Yes, i want to connect to the network… 🙂

The wizard will then try to connect to the network and will probably ask you to enter the network location of the image and an account with privileges to access to it.


Click OK…

The backup image information will be populated, select it and the click Next button…


Click Next to begin restoring your image.


Once the restoration is complete, click the Finish button to complete the process.

Log in to Windows 7 with your credentials.

Windows 7 will be automatically reactivated upon log in and will ask your to restart your newly re-imaged virtual machine.


Leave a Reply